회원 가입 시 사용자가 입력한 메일이 유효한 지 확인하기 위해 메일에 인증 코드를 전송하고,
해당 인증 코드 일치 여부를 검사하는 기능을 구현해보고자 한다.
(해당 포스트에선 naver 메일로 인증을 진행한다.)
코드를 작성하기 전에 네이버 메일에 접속하여 smtp 설정이 필요하다.

메일을 전송할 네이버 계정에 로그인한 후 메일 인터페이스 하단 환경설정을 클릭한 후
위와 같이 설정하고 하단의 SMTP 포트 번호를 확인한다.
설정을 완료하면 메일 주소를 입력할 input 태그를 작성한다.
<div>
  <input type="email" id="email"/>
  <input type="button" value="Send" onclick="send();"/>
</div>
onclick 이벤트를 통해 send() 함수를 실행시켜 메일 전송을 진행한다.
해당 이벤트로 발생되는 send() 함수는 아래와 같다.
var result;
function send() {
	var mail = $("#email").val();

	$.post("sendmail", {
		"mail" : mail
	}, function(data) {
		alert("The authentication number has been sent. Please check your mailbox.");
		result = data;
	});
}
인증 번호값을 저장할 전역 변수 result 를 생성,
send() 함수에서 메일 주소값을 mail 변수에 저장해 post 방식으로 controller 에 전송한다.
@RequestMapping("sendmail")
public String sendmail(String mail, Model model) {
	Random random = new Random();
	int auth = random.nextInt(888888) + 111111;
전송한 값이 mail 파라미터에 저장되며 인증 번호값을 넘길 Model 객체를 생성하고
인증 번호를 Random 객체를 통해 8자리 무작위 수를 생성하여 auth 변수에 저장한다.
String charSet = "utf-8";
String hostSMTP = "smtp.naver.com";
String hostSMTPid = "######";
String hostSMTPpwd = "********";

String fromEmail = "######@naver.com";
String fromName = "graycode";
String subject = "This is your email verification number.";
주석 처리한 부분에 각각 메일을 전송할 계정 아이디, 비밀번호, 메일 주소를 입력하고
전송할 메일의 발송자명, 제목을 지정한다.
try {
    HtmlEmail email = new HtmlEmail();
    email.setDebug(true);
    email.setCharset(charSet);
    email.setSSLOnConnect(true);
    email.setHostName(hostSMTP);
    email.setSslSmtpPort("587");

    email.setAuthentication(hostSMTPid, hostSMTPpwd);
    email.setStartTLSEnabled(true);
    email.addTo(mail, charSet);
    email.setFrom(fromEmail, fromName, charSet);
    email.setSubject(subject);
    email.setHtmlMsg("<p align='center'><b>Welcome to membership.</b></p><br>"
            + "<div align='center'> Authentication number : " + auth + "</div>");
    email.send();
} catch (Exception e) {
    System.out.println(e);
}

model.addAttribute("auth", auth);

return "auth";
위의 코드에서 setSslSmtpPort 에 처음 smtp 설정 시 확인했던 SMTP 포트 번호를 입력하고
email.setHtmlMsg() 의 파라미터에 메일의 내용을 작성한다.
이 경우 간단한 마크업 코드를 문자열로 작성하였다.
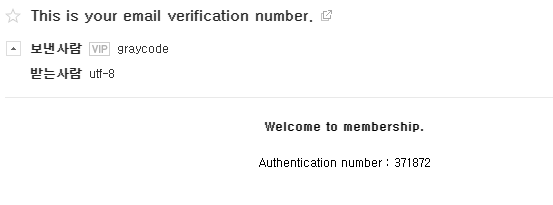
메일의 내용은 위와 같으며 보낸 사람과 받는 사람의 메일 정보는 마스킹 처리하였다.
이후 Model 객체로 이전에 생성한 인증 번호를 미리 생성한 jsp 페이지에 공유한다.
<!-- auth.jsp -->
${auth}
해당 페이지 자체가 결과값으로써 이전에 작성한 js 함수 send() 에 data 로 반환되어 result 전역 변수에 저장된다.
<div>
  <input type="text" id="token"/>
  <input type="button" value="Check" onclick="check()"/>
</div>
다시 jsp 페이지로 돌아와 인증 번호를 입력할 input 태그에
메일에서 확인한 인증 번호를 입력하고 check() 함수를 실행시킨다.
function check() {
	var token = $("#token").val();

	if (result == token) {
		alert("Authentication Success.");

		return false;
	} else {
		alert("Authentication Failed.");
		$("#token").val("").focus();

		return false;
	}
}
태그에 작성한 인증 번호값이, controller 에서 공유한 인증 번호값을 저장한 result 변수와 일치하는 지 여부에 따라
분기를 주어 메일 인증을 완료한다.
전체 controller 코드는 아래와 같다.
@RequestMapping("sendmail")
public String sendmail(String mail, Model model) {
    Random random = new Random();
    int auth = random.nextInt(888888) + 111111;

    String charSet = "utf-8";
    String hostSMTP = "smtp.naver.com";
    String hostSMTPid = "######";
    String hostSMTPpwd = "********";

    String fromEmail = "######@naver.com";
    String fromName = "graycode";
    String subject = "This is your email verification number.";

    try {
        HtmlEmail email = new HtmlEmail();
        email.setDebug(true);
        email.setCharset(charSet);
        email.setSSLOnConnect(true);
        email.setHostName(hostSMTP);
        email.setSslSmtpPort("587");

        email.setAuthentication(hostSMTPid, hostSMTPpwd);
        email.setStartTLSEnabled(true);
        email.addTo(mail, charSet);
        email.setFrom(fromEmail, fromName, charSet);
        email.setSubject(subject);
        email.setHtmlMsg("<p align='center'><b>Welcome to membership.</b></p><br>"
                + "<div align='center'> Authentication number : " + auth + "</div>");
        email.send();
    } catch (Exception e) {
        System.out.println(e);
    }

    model.addAttribute("auth", auth);

    return "auth";
}'Web Development > ETC' 카테고리의 다른 글
| [MyBatis] MyBatis 를 활용한 동적 쿼리 (0) | 2022.06.28 |
|---|---|
| [Web Programming] Checkbox 다중 값 전달 (0) | 2022.06.27 |
댓글